Current: Editing Announcements
Editing Announcements lets administrators update an existing check-in or scheduled announcement without creating a new one. Use this when the message, timing, audience, attachments, or active settings need to change.
Start from Operations > Announcements. Choose the announcement category, find the announcement you want to revise, then click the green pencil in that announcement's action area.
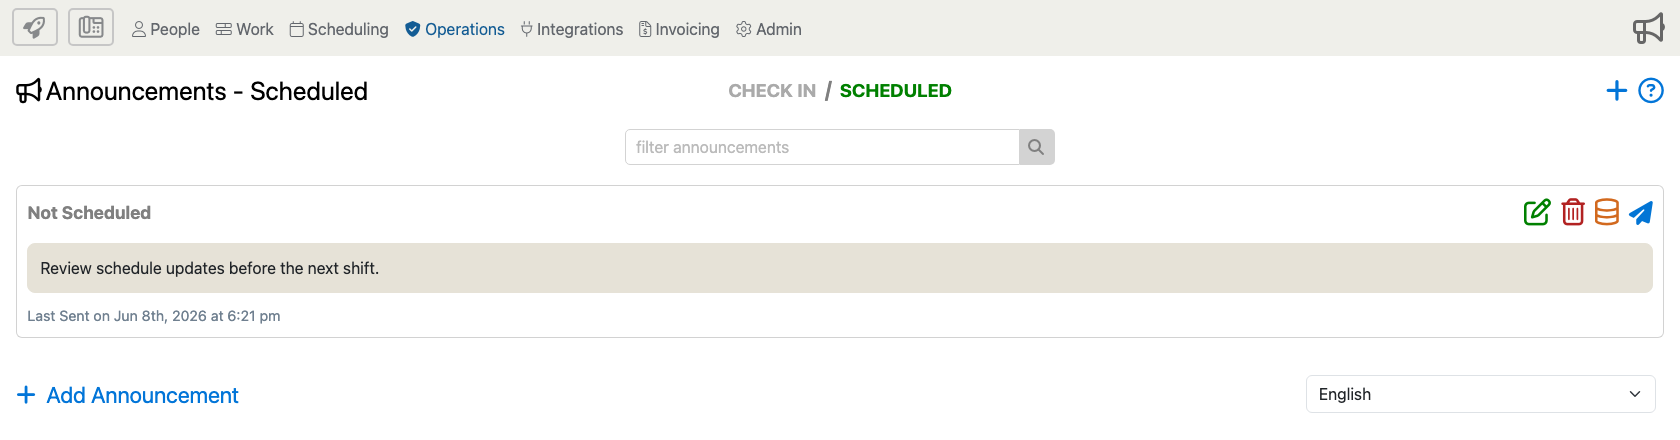
For scheduled announcements, the edit form uses the same fields as the add form. Update the announcement text, link, send timing, employee targeting, attachments, or template choice, then save the form.
The scheduled announcement edit form uses the same option layout as the add form. Review the full form below, then use the blue i markers to jump to details about the options they explain.
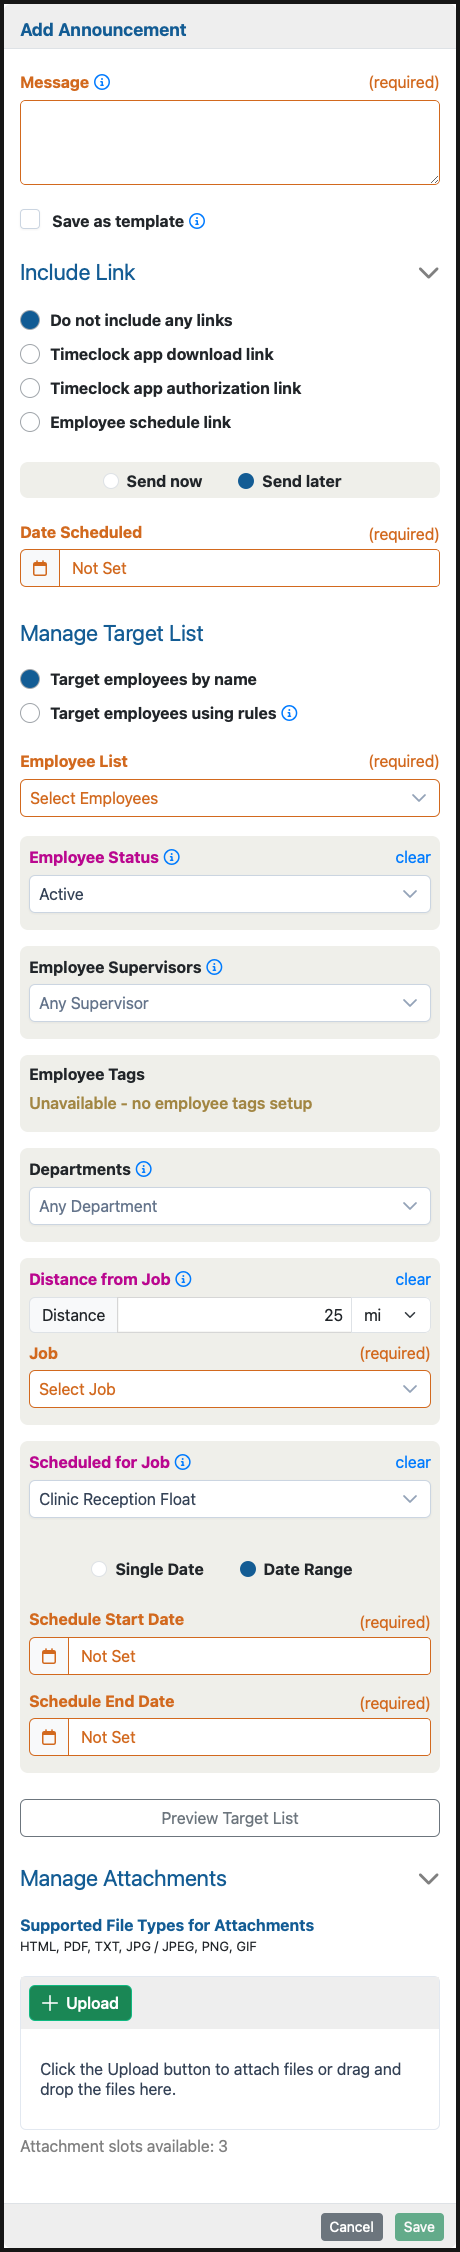
The form below shows the full set of options you may encounter. Some sections appear only after you choose the related link, targeting, scheduling, attachment, or employee-filter option, and some filters may appear only when your company uses the related employee tags, departments, jobs, or schedules.
Form Options
Message And Link
Message
Enter the announcement text employees should receive. When supported by your company settings, the message can be translated into employee languages when it is sent.
Include Link
Use Include Link when the announcement should include an employee app or schedule link. Available choices can include no link, a Timeclock app download link, a Timeclock app authorization link, or an employee schedule link.
Save As Template
Select Save as template when you want to keep the announcement available for later reuse. Leave it unchecked when the announcement is only needed for this send or scheduled send.
Send Timing
Send Now Or Send Later
Choose Send now to send the announcement as soon as you submit it. Choose Send later to schedule it for a future date and time.
Date Scheduled
When Send later is selected, set the date and time the announcement should be sent. The form requires a scheduled date unless the announcement is being saved as a reusable template.
Target Employees
Manage Target List
Use this area to decide whether to send the announcement to specific employees or to employees selected by rules. The audience should match the group that actually needs the message.
Target Employees By Name
Select this option when you know exactly which employees should receive the announcement.
Employee List
Use Employee List to choose named recipients. At least one employee is required when targeting by name.
Target Employees Using Rules
Select this option when the recipient list should be built from filters. Each selected rule narrows the target list, so only employees who match all selected criteria are included.
Employee Status
Use Employee Status to target active employees, inactive employees, or any status. Most operational announcements should be sent only to active employees.
Employee Supervisors
Use Employee Supervisors to target employees assigned to one or more supervisors. This is useful when the announcement applies to one manager's team or a group of teams.
Employee Tags
Use Employee Tags when your company tags employees by role, credential, region, or other grouping. When tags are selected, employees must match the selected tag rules to be included. If no tags are set up, the filter appears as unavailable.
Departments
Use Departments to narrow the announcement to employees in specific departments or business units.
Distance From Job
Use Distance from Job when the announcement should go only to employees within a chosen distance of a job. After entering the distance, select the job that should be used for the location check.
Job
The Job field is required when distance targeting is used. Choose the job site that the distance rule should be measured from.
Scheduled For Job
Use Scheduled for Job to target employees who are scheduled for one or more jobs on a single date or across a date range.
Schedule Date Range
Choose Single Date when the job-schedule rule should check one day. Choose Date Range when the rule should include employees scheduled during a range of dates, then enter the start and end dates.
Preview Target List
Use Preview Target List before sending when you want to confirm which employees will receive the announcement. This is especially helpful when several targeting rules are used together.
Attachments And Actions
Manage Attachments
Open Manage Attachments when the announcement should include a supported file. Supported attachment types include HTML, PDF, TXT, JPG/JPEG, PNG, and GIF.
Upload Attachments
Use Upload to attach files, or drag supported files into the upload area. The form shows how many attachment slots are still available.
Save, Send, Or Cancel
The footer button changes based on the timing choice. Use Send for immediate announcements, Save for scheduled announcements or templates, or Cancel to close the form without saving changes.
Editing Check In Announcements
Check-in announcements use a related form focused on the clock-in experience. When editing a check-in announcement, review the active status, priority, name, date range, message, targeted employees, targeted job sites, always-play behavior, acknowledgement setting, advanced options, and attachments.
Some check-in options only appear when your company uses the related modules or settings. If an option is not visible, it usually means that option is not available for the selected announcement type or company setup.