Action Points Overview
Action Points are QR codes posted at specific places in the field. A person onsite scans the QR code with a phone, opens a short request form, and sends information back to your team without needing to log in to the administrative portal.
For a janitorial company, an Action Point might be posted outside a restroom, break room, lobby, or tenant hallway so a tenant or building occupant can report that an area needs cleaning. For a security company, an Action Point might be posted at a front desk, loading dock, parking garage, or tenant entrance so someone can request assistance from a guard. Each QR code should represent a real location and a clear response path.
What Action Points Can Do
- Collect basic feedback. The standard Basic Feedback type shows a mobile form where the requester enters comments. Submitting the form creates a Trouble Ticket for admin follow-up.
- Request an on-site worker. When enabled, the On-Site Worker Request type lets someone request a worker who is currently on site for the linked job, such as a guard or janitor.
- Connect requests to the right job. A linked job gives the ticket location context and is required for on-site worker request availability checks.
- Control the requester instructions. The instructions you enter are shown on the scanned form, so the requester knows what details to provide.
- Set ticket priority. The Action Point can assign a default priority, or you can allow the requester to choose the priority when that is appropriate for your workflow.
- Protect public request points with a PIN. A PIN can be required before someone uses the Action Point. This is especially important for on-site worker requests because opening the form may reveal whether workers are currently on site.
- Collect photos. Photo attachments help with spills, damage, blocked access, maintenance problems, safety issues, and other conditions that are easier to understand visually.
- Print and post working QR codes. Each Action Point has its own printable QR code. The description and QR Code Footer help make the printed sign understandable at the job site.
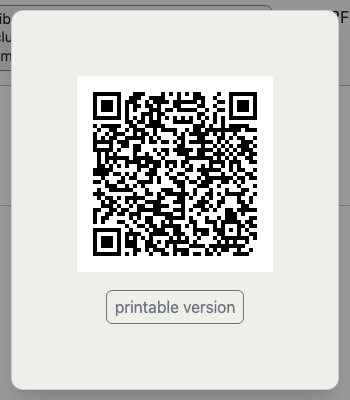
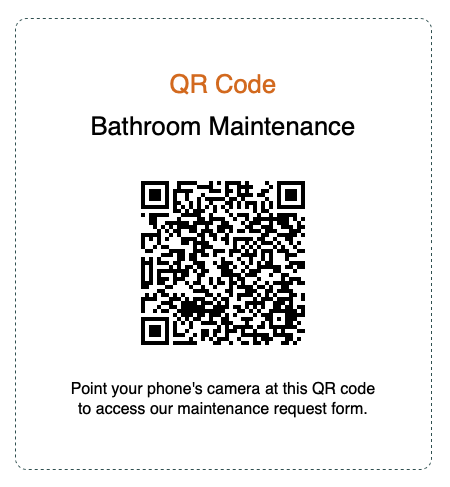
Example QR Code
Here is a current example of an Action Point that a janitorial company might post outside a restroom. Scan it with a phone to see the requester form.
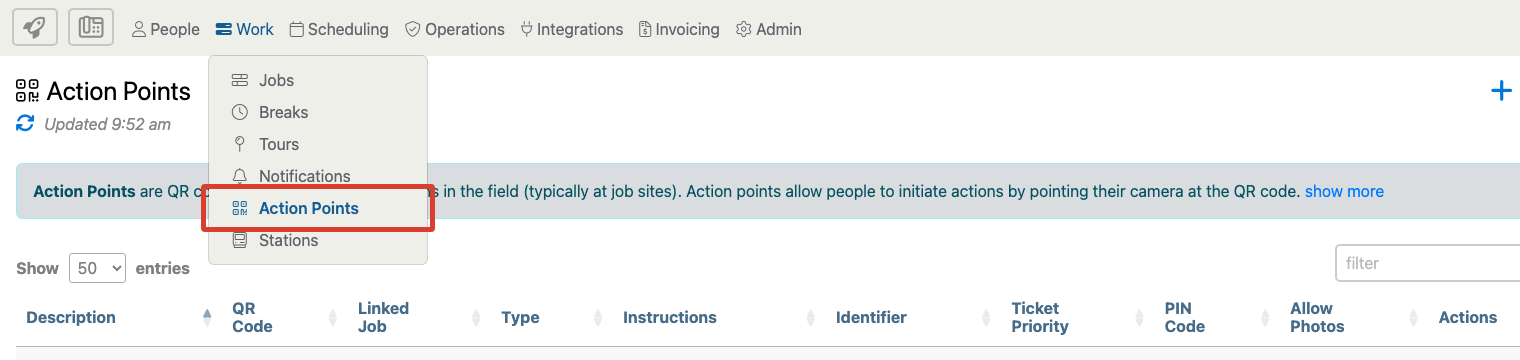
Open The Action Points Page
Open Work, then choose Action Points. The Action Points page is the control center for QR codes your company posts in the field.
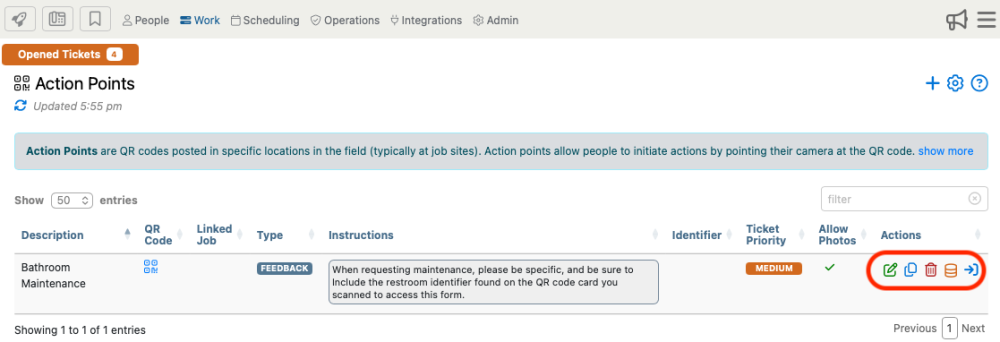
Highlights Of The Action Points Page
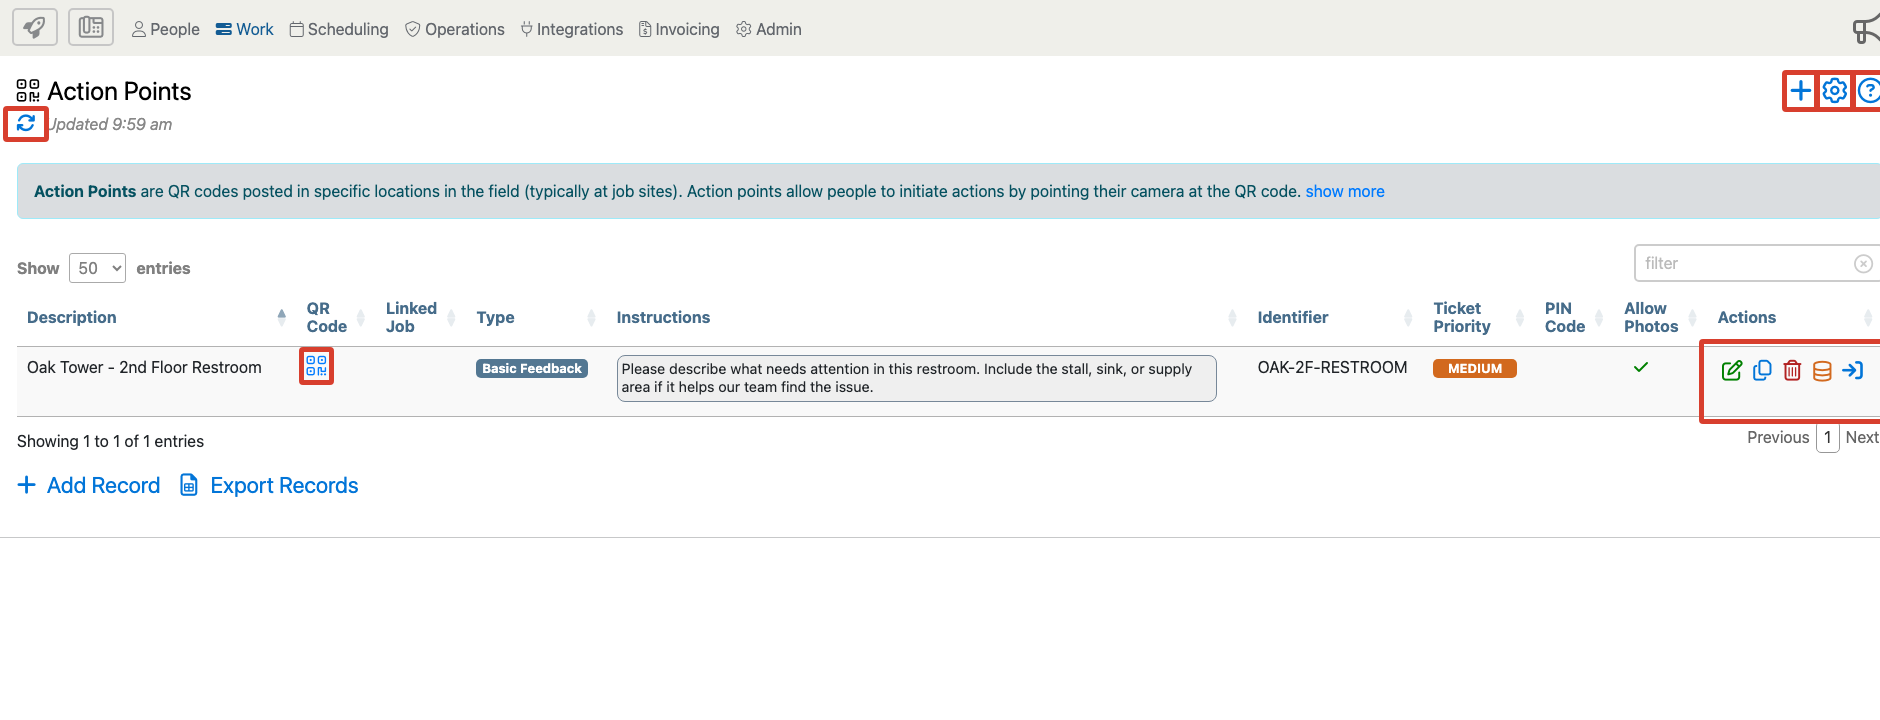
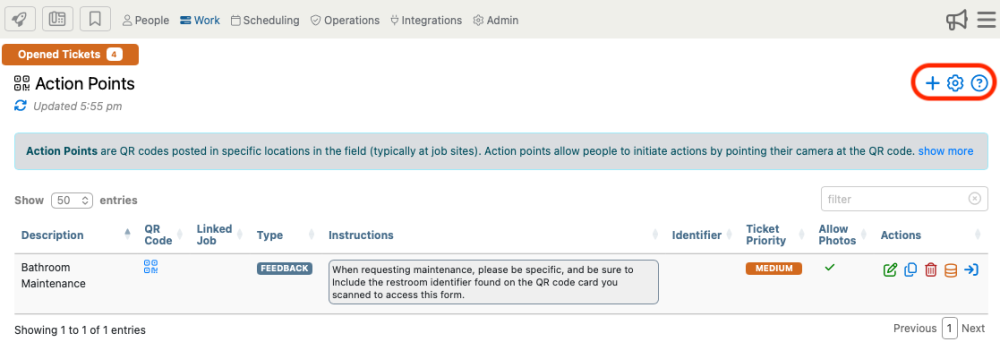
The Action Points page shows each QR code record, the request type, requester instructions, priority behavior, PIN and photo settings, and the row actions used to manage each code.
Page Controls
- Add Record creates a new Action Point.
- Manage Columns lets you choose which columns appear in the list.
- Show Help expands the page explanation.
- Refresh Data reloads the Action Points list.
- Filter helps you find a specific QR code by description, job, type, instructions, identifier, or other visible columns.
- Export Records downloads the list when you need an offline inventory of posted QR codes.
Row Actions
- QR Code opens the working QR code for that Action Point. Use this when you are ready to print or reprint the sign.
- Edit changes the setup behind an existing QR code.
- Clone copies a similar Action Point so you can make a new code for another location.
- Delete removes an Action Point you no longer use. Remove or replace the physical sign before deleting the record.
- Audit History shows record changes.
- App View opens a preview of the requester experience.
Plan The QR Code Before You Create It
A good Action Point is specific. Before creating a QR code, decide what the sign is for and how your team will respond.
- Location: Use one Action Point for one physical place, such as Oak Tower - 2nd Floor Restroom, North Lobby Guard Desk, or Garage Level B Elevator Bay.
- Requester: Decide who will scan it: tenants, visitors, guards, janitors, employees, supervisors, or the public.
- Request type: Use Basic Feedback for a ticket-based request. Use On-Site Worker Request when the QR code should request an eligible worker who is already on duty for the linked job.
- Job: Link the job that represents the location. This is helpful for all tickets and required for on-site worker request availability.
- Priority: Set the default priority to match the real urgency of the posted sign.
- PIN: Use a PIN when the code is posted in a public area or when the request may reveal operational information, such as whether workers are currently on site.
- Photos: Allow photos when visual context helps the response team. Leave photos off when speed and simplicity matter more.
- Printed text: Make the sign understandable to someone who has never used Telephone Timesheets.
Add Or Edit Action Point Setup
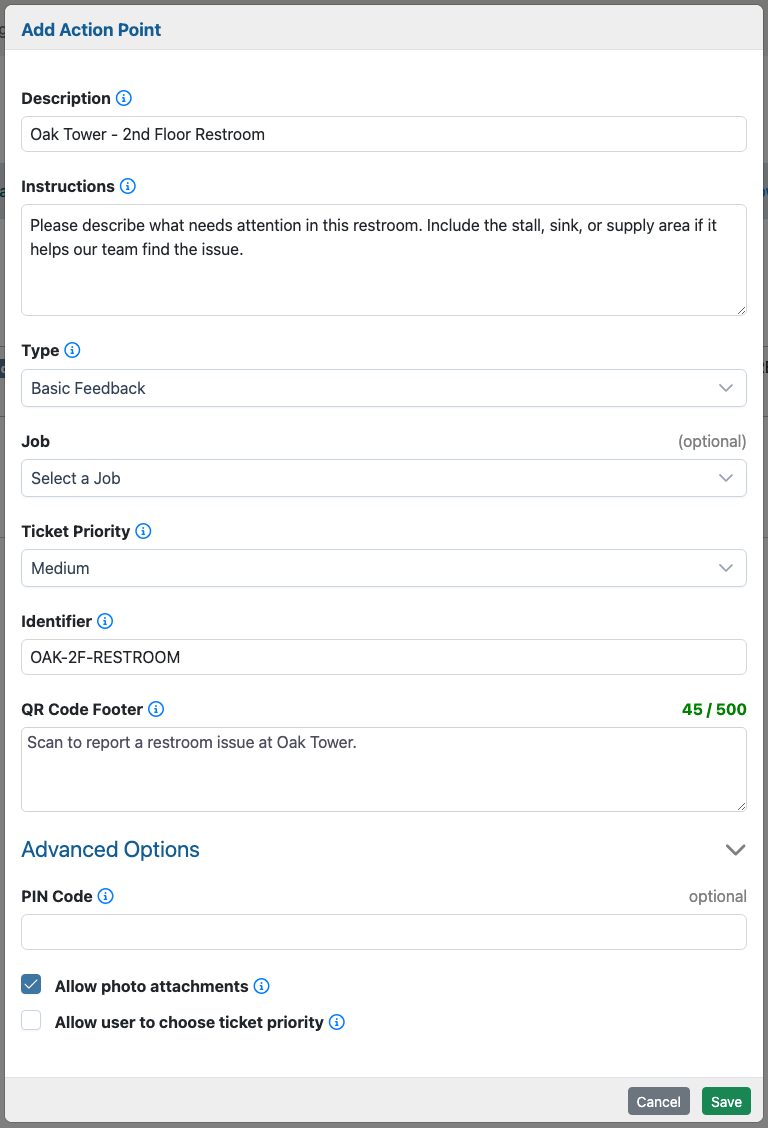
The Add Action Point and Edit Action Point forms control the printed QR code, the scanned mobile form, and the ticket or worker-request workflow that follows.
Description
The description identifies the Action Point and is exposed to the requester. Use a clear location or purpose, such as Oak Tower - 2nd Floor Restroom or North Lobby Guard Request. Avoid vague labels such as Lobby or Restroom when your company manages multiple locations.
Instructions
Instructions are shown on the mobile form after someone scans the QR code. Write them like a sign at the site. Tell the requester what to report, which details matter, and whether a photo is useful.
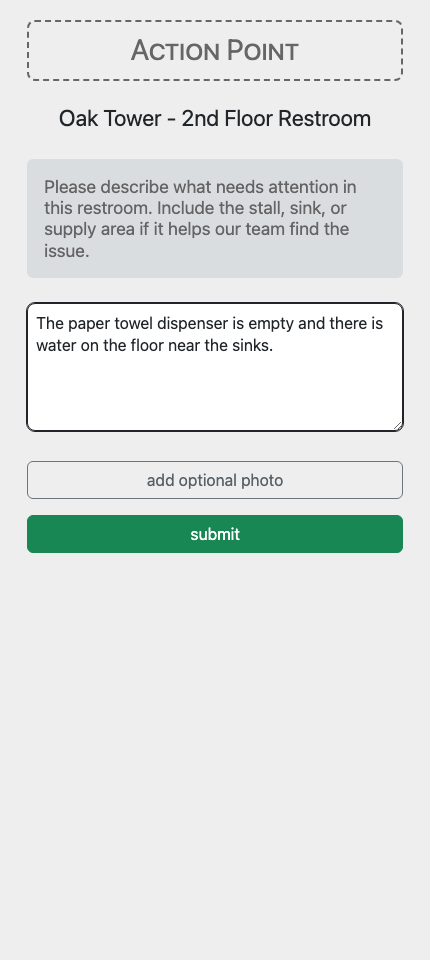
For a restroom Action Point, a good instruction is: Please describe what needs attention in this restroom. Include the stall, sink, or supply area if it helps our team find the issue.
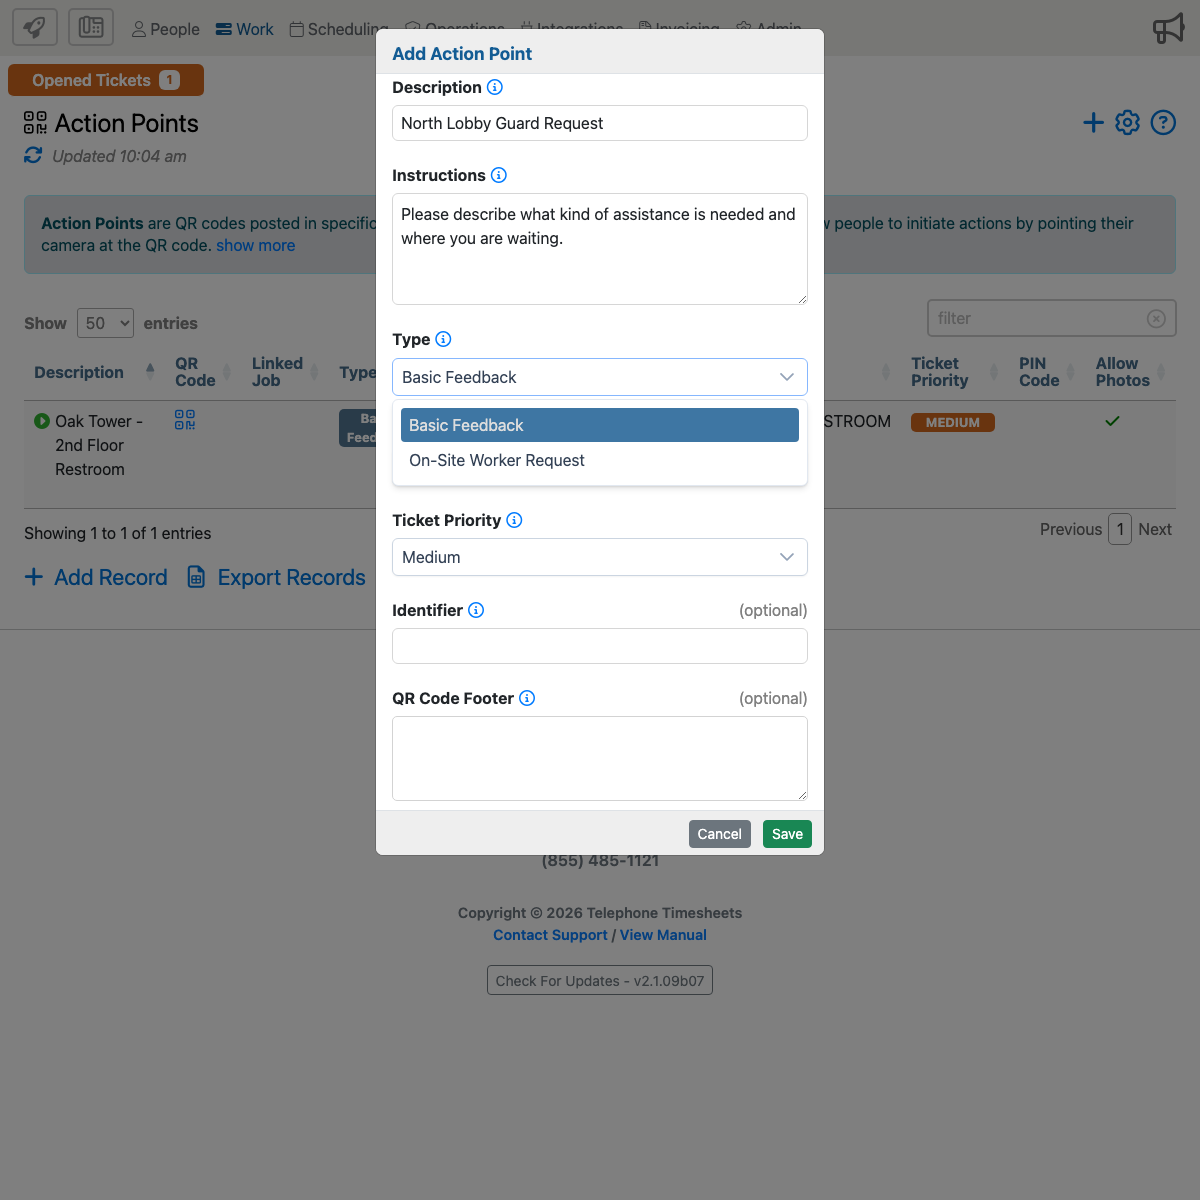
Type
Basic Feedback shows the standard feedback form. The requester enters comments, optionally adds a photo, and submits the form. Telephone Timesheets creates a Trouble Ticket.
On-Site Worker Request is used when the QR code should request an eligible worker already on duty for the linked job. This type requires a worker type and a linked job.
Job
The linked job connects the request to the correct work location. For Basic Feedback, the job is copied to the Trouble Ticket. For On-Site Worker Request, the job is required because worker availability is checked against that job.
Ticket Priority
Ticket Priority sets the default priority for tickets created from the Action Point. Use a priority that matches the sign. A routine supply or cleaning request may be medium priority. A safety, access, or security request may need a higher priority.
Identifier
The identifier is an internal location code. It is not shown to the requester, but it is included with generated tickets. Use it to distinguish similar signs, such as REST-2W, GAR-B-ELEV, or LOBBY-NORTH.
QR Code Footer
The QR Code Footer prints below the QR code. Use short public-facing text such as Scan to report a restroom issue or Scan to request assistance at this entrance.
PIN Code
When a PIN is set, the requester must enter that numeric PIN before using the Action Point. PINs can include leading zeroes. Use a PIN for public signs when you want to limit use to tenants, employees, or authorized occupants. PINs are especially important for on-site worker requests because reaching the form may reveal whether workers are currently on site.
Allow Photo Attachments
Allow Photo Attachments lets the requester attach images. Enable it for spills, damage, broken fixtures, blocked doors, graffiti, safety concerns, or anything else that is easier to explain with a picture.
Allow User To Choose Ticket Priority
When selected, the mobile form gives the requester a priority dropdown. Use this only when the requester can judge urgency accurately. For public QR codes, many companies keep this off and let admins control priority from the Action Point setup.
On-Site Worker Request Setup
When On-Site Worker Request is selected, the form adds setup requirements for worker dispatch. The Action Point must know what type of worker is being requested and which job to check for on-duty workers.
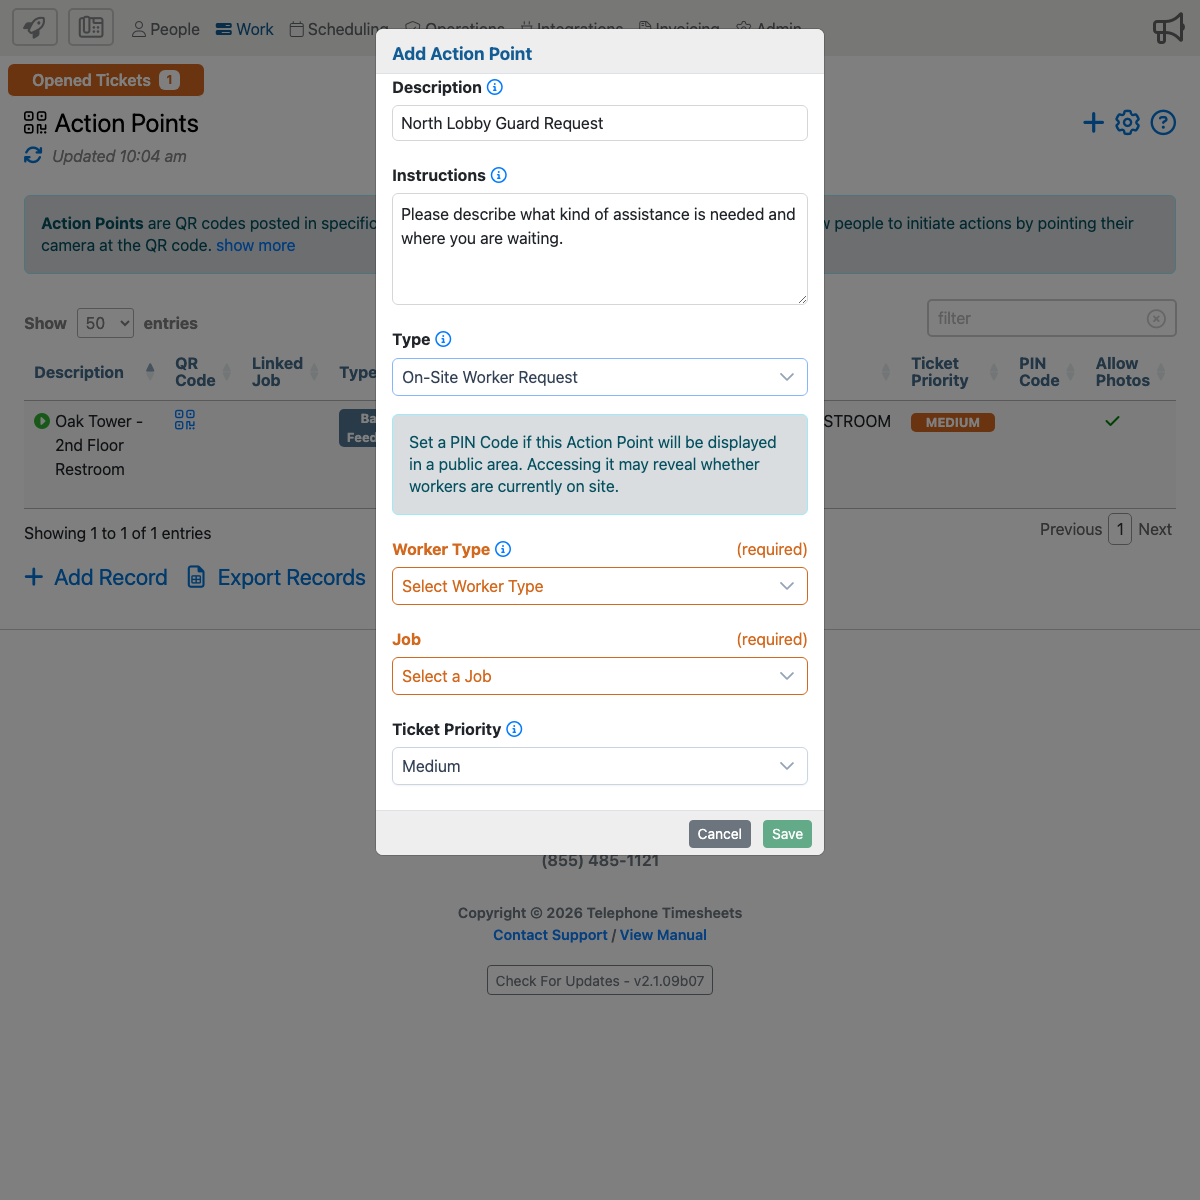
- Worker Type: Choose the worker category that should respond, such as guard, janitor, or another configured worker type.
- Job: Choose the job where eligible workers clock in. If the job is wrong, Telephone Timesheets may not find the workers who are actually on site.
- PIN Code: Strongly consider a PIN for public on-site worker request signs because checking the form may reveal availability.
- Instructions: Tell the requester what kind of help they are requesting and what details to include, such as entrance, floor, suite, desk, loading dock, or parking level.
For example, a security company might post a QR code at a lobby desk with the description North Lobby Guard Request, type On-Site Worker Request, worker type Guard, and the lobby security job selected. A janitorial company might use the same workflow to request an available cleaner at a large property.
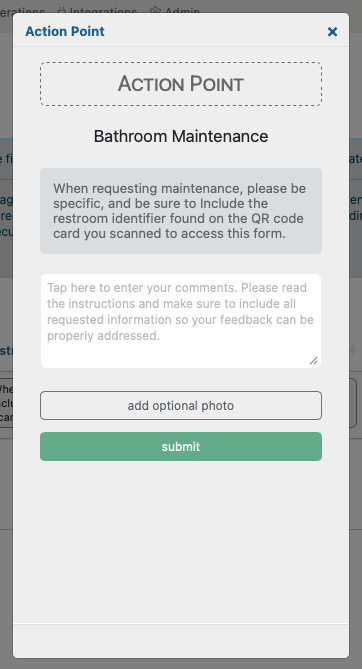
What The Requester Sees
When someone scans a Basic Feedback Action Point, the mobile form shows the Action Point description, instructions, comments box, optional photo button, and submit button.
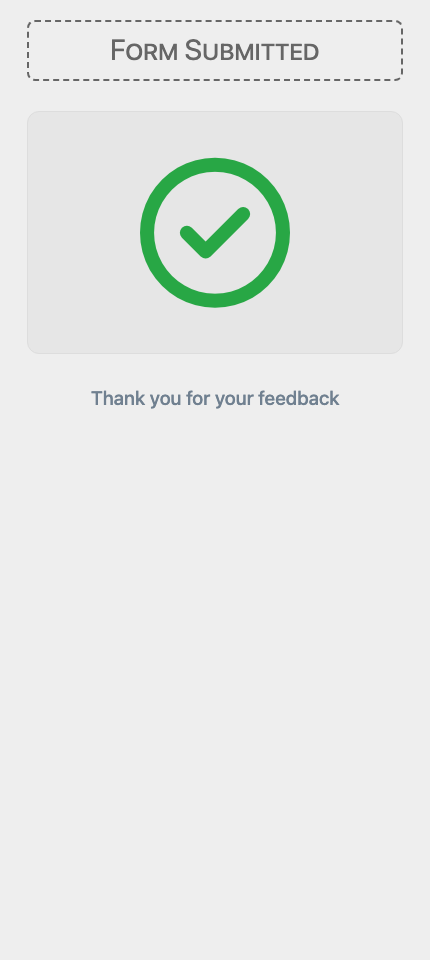
After the requester submits the form, they see a confirmation.
For an on-site worker request, the requester experience depends on worker availability and company setup. The requester may need to enter a PIN, then Telephone Timesheets checks whether eligible workers are currently on site for the linked job and worker type. If no eligible worker is available, the requester should not be led to believe help has been dispatched. If a worker is available, the request can move into the worker-request and ticket follow-up workflow.
How Action Point Requests Appear In Trouble Tickets
A Basic Feedback Action Point creates a Trouble Ticket. The requester comments become the ticket description. The Action Point description and identifier identify the origin. The linked job is copied to the ticket when present. The Action Point priority becomes the ticket priority unless the form allows the requester to choose priority. Any submitted photos are attached to the ticket.
For on-site worker requests, the ticket is also the admin record for the request and follow-up. Admins should review the job, worker type, requester details, request status, notes, and any worker-response history available for the request.
Real-World Setup Patterns
Janitorial Restroom Request
Use one QR code per restroom or floor. Link the janitorial job, keep the type as Basic Feedback, allow photos, and write instructions that ask for the fixture, stall, supply area, or spill location. Use a footer such as Scan to report a restroom issue.
Security Guard Request
Use On-Site Worker Request when the QR code should request a guard already working at that site. Link the correct security job, choose the guard worker type, and use a PIN if the sign is public. The sign should say exactly what it does, such as Scan to request guard assistance at this entrance.
Tenant Maintenance Or Service Desk
Use Basic Feedback for service desk, maintenance, supply, cleanliness, or facility requests that should become tickets. Link the property or service job, allow photos when useful, and use an identifier to distinguish similar signs across floors or buildings.
Separate Workflows At The Same Location
If one location needs more than one workflow, create separate Action Points and post separate signs. For example, a lobby might have one QR code for Report A Facility Issue and another for Request A Guard. This keeps the requester from accidentally triggering the wrong workflow.
Testing Checklist
- Open the QR code from the Action Points list.
- Scan it with a phone before posting it in the field.
- Confirm the form shows the correct description, instructions, photo option, and priority behavior.
- Submit a test request and verify the resulting Trouble Ticket has the right origin, job, priority, identifier, description, and attachments.
- For an on-site worker request, test the PIN, no-worker state, available-worker state, worker response handling, and admin ticket follow-up before posting the sign.
- Reprint the sign whenever the visible description, footer, public instructions, request type, or location changes.
- Remove or replace physical signs when an Action Point is deleted, cloned, or repurposed.
Related Pages
Use Adding Action Points for the full setup walkthrough, Editing Action Points for changing existing QR codes, On-Site Worker Requests for the worker-request workflow, and Trouble Tickets for admin follow-up after a request is submitted.

 , adjust settings
  , and find additional information about the action points page
  .
.
 , delete
  , clone
  , view audit history
  , open an emulator that shows you what users see when they point their camera at an action point QR code and clock the link.